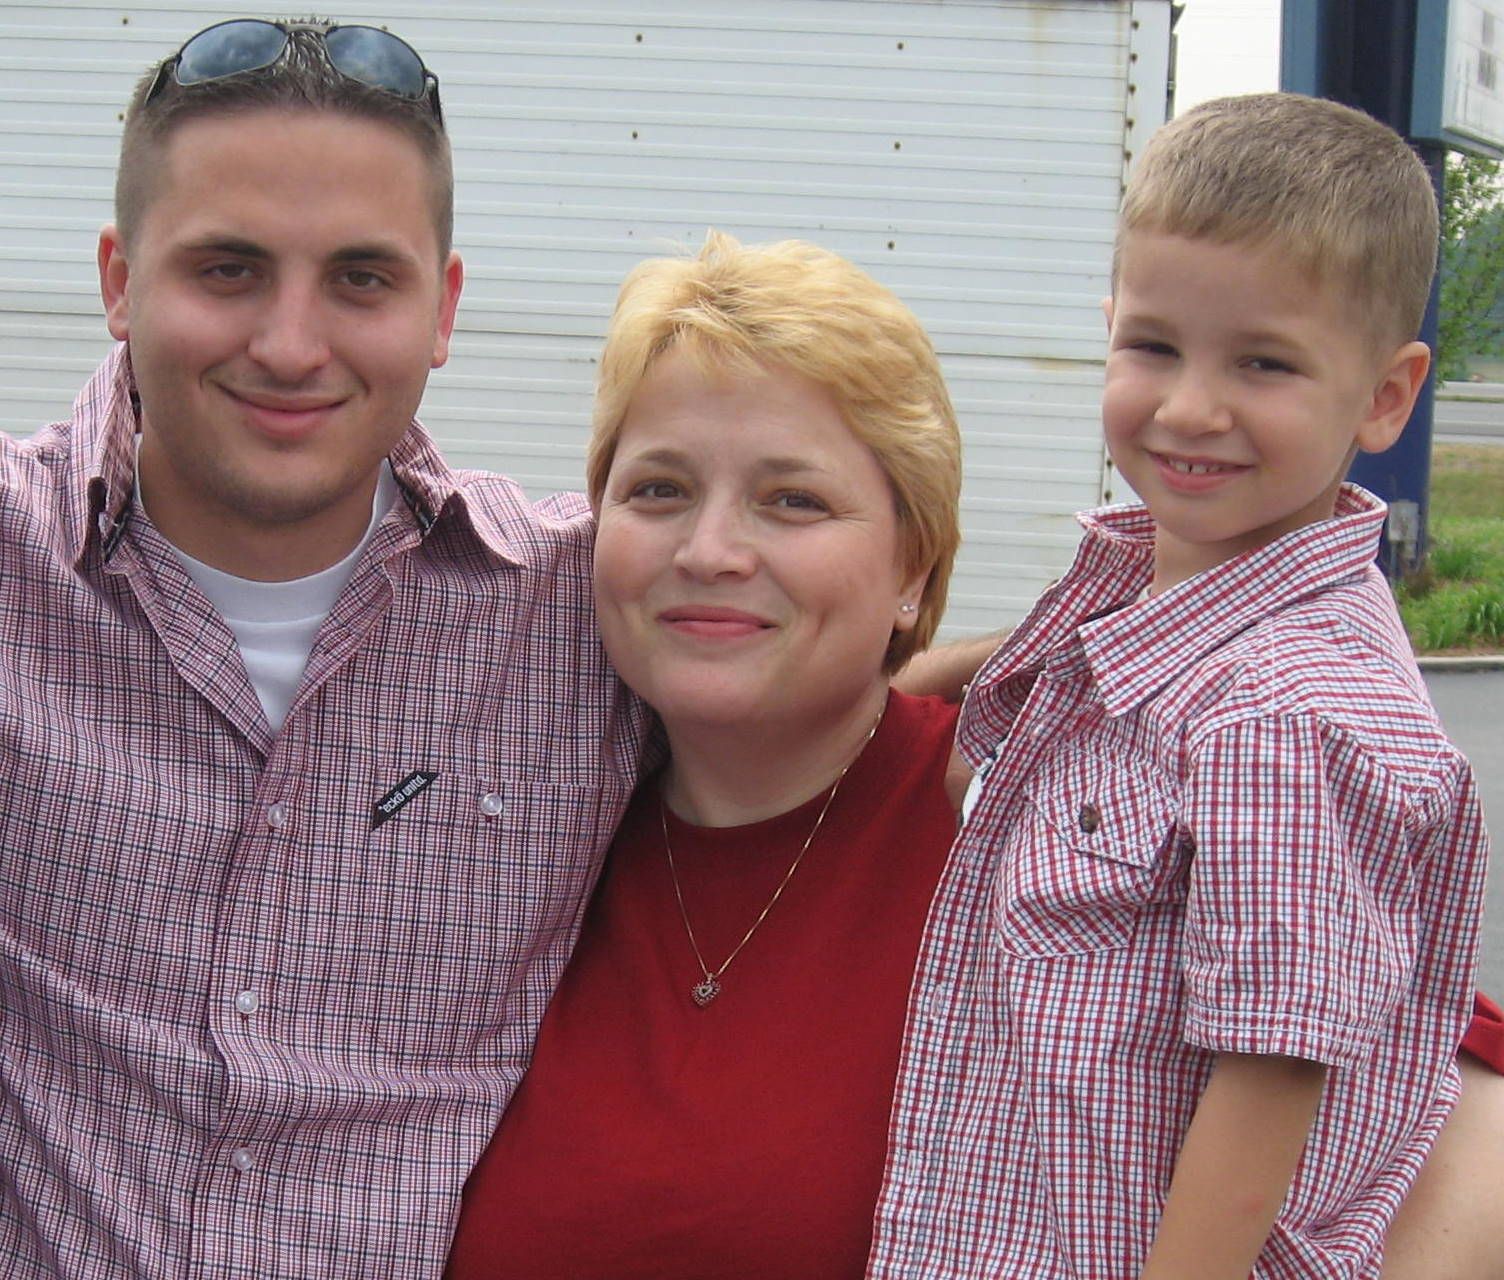
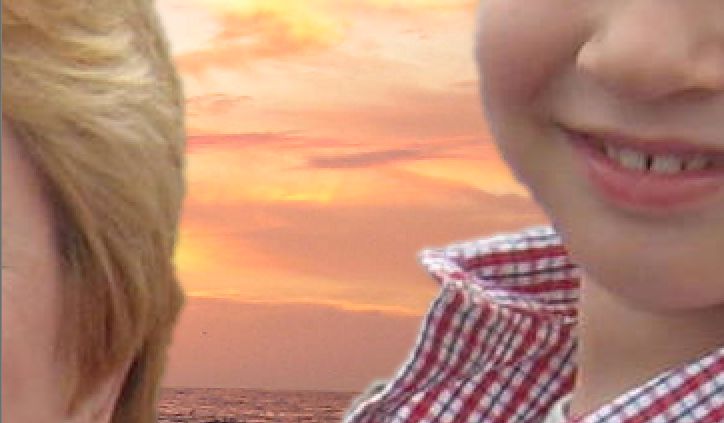
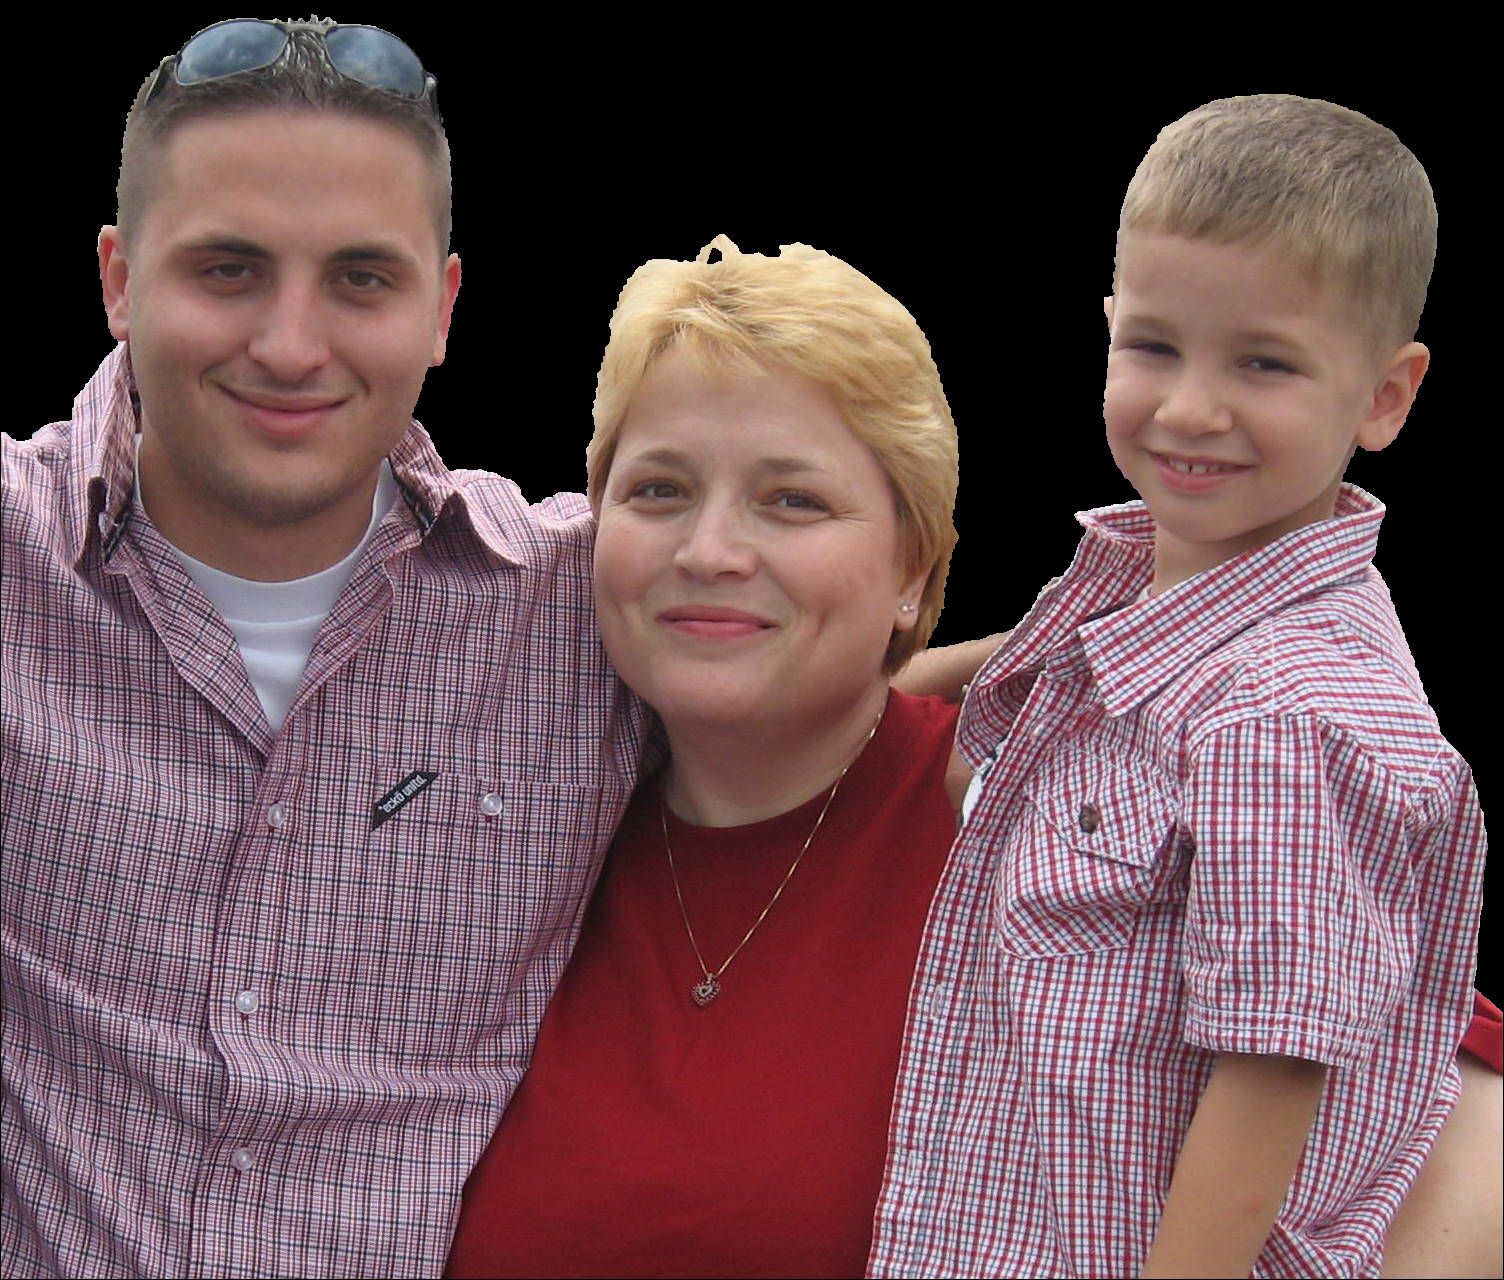
Before
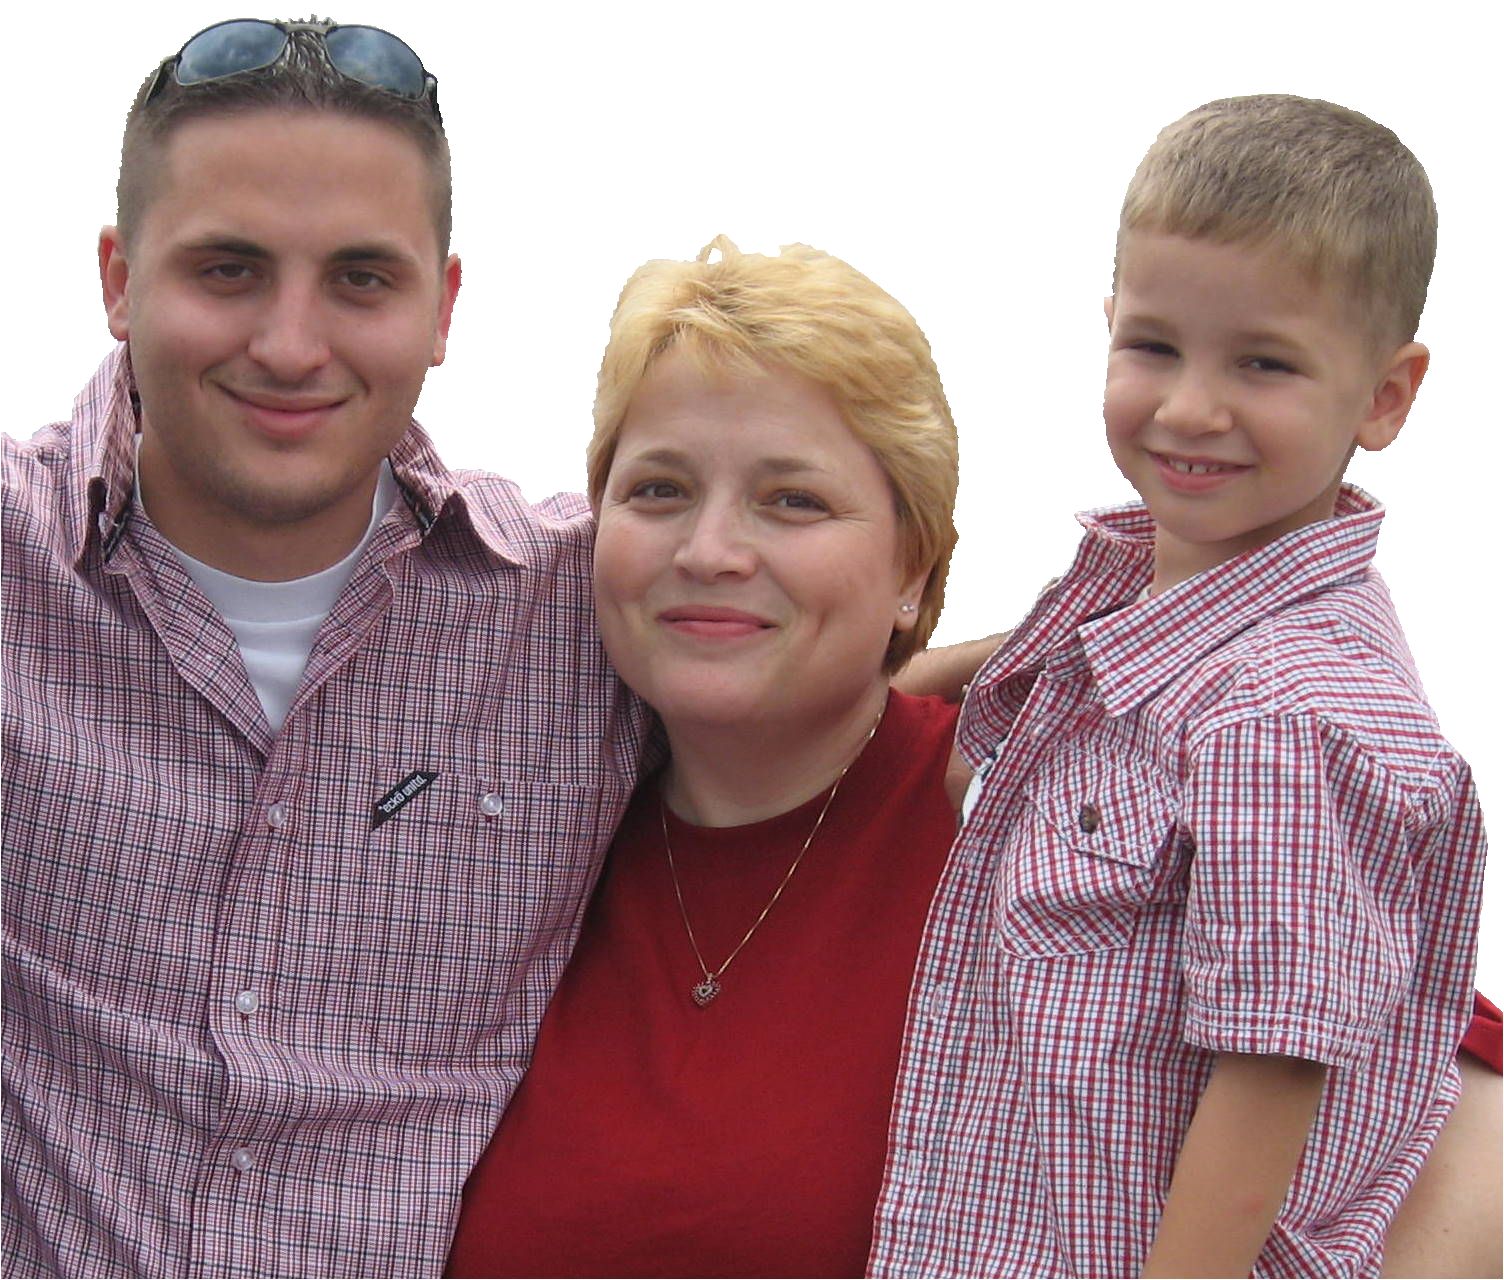
Turn the picture at left to look like the picture at right.
Click on the picture to the right to download a high resolution of it.
Then zoom in on the borders and examine how smooth they are!
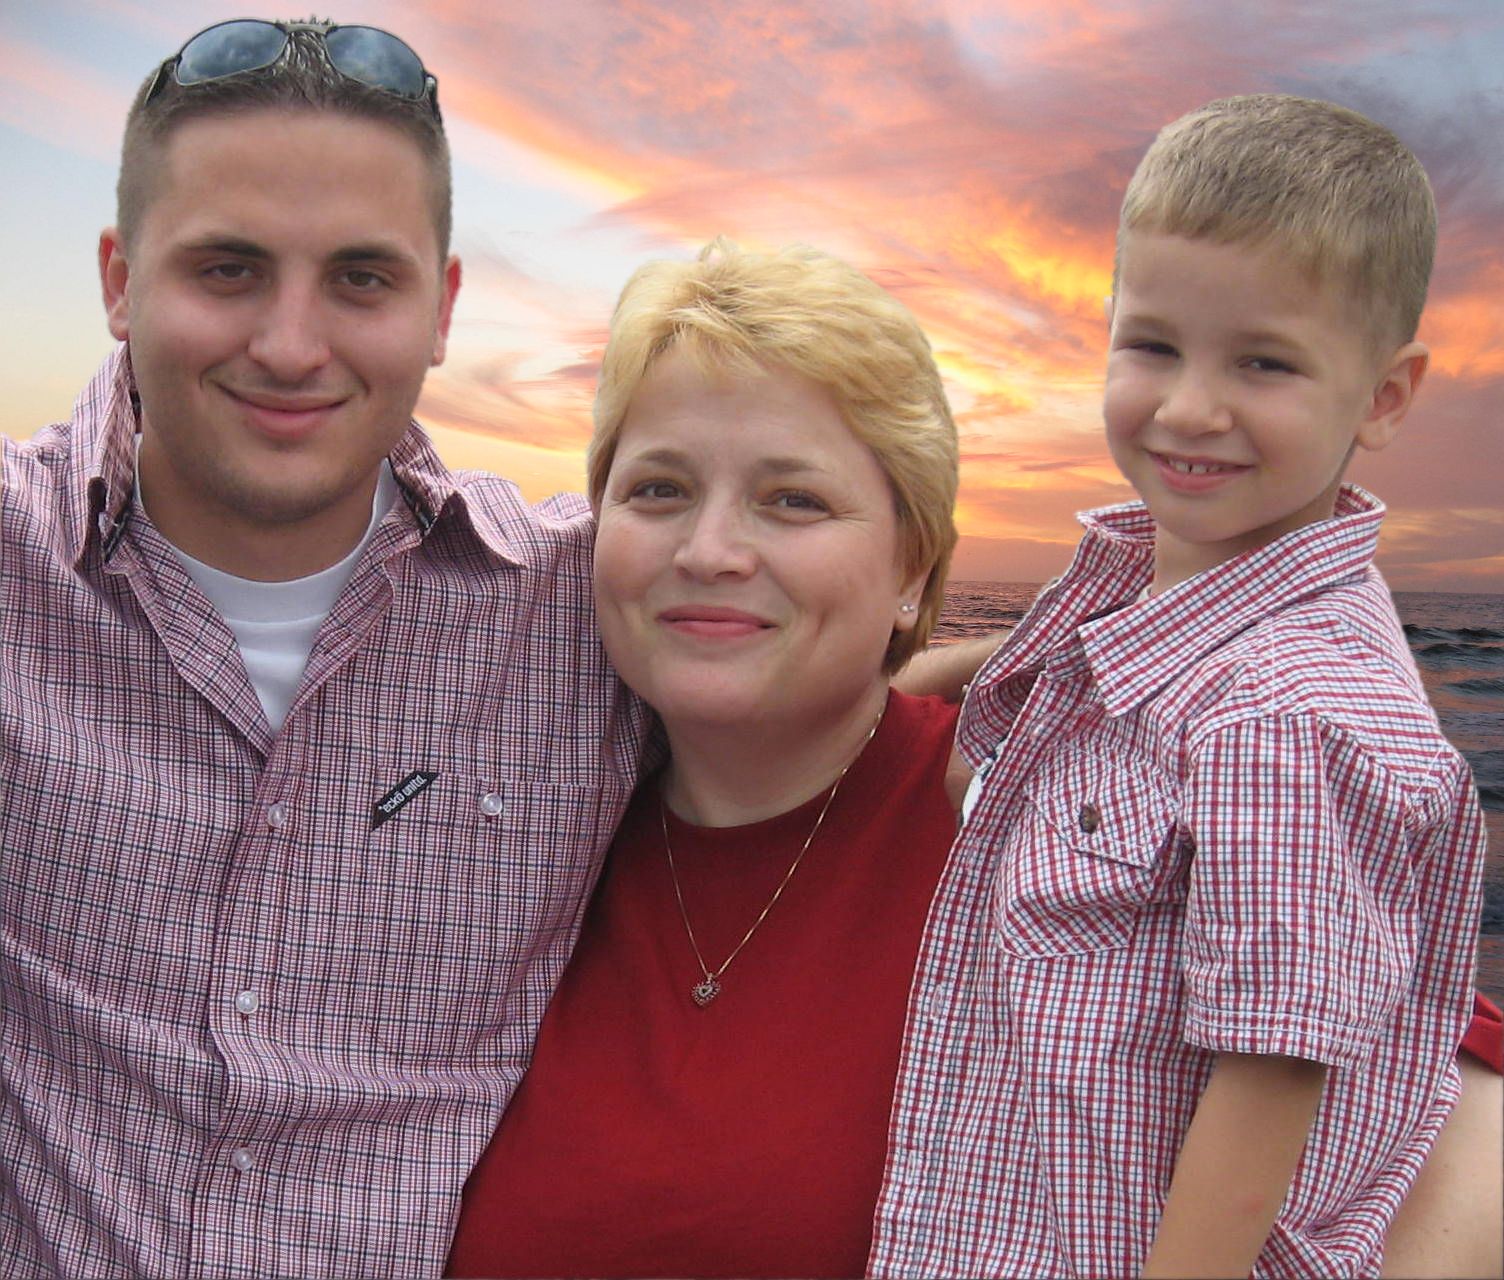
After
AutoBlend
Blend and soften borders automatically – in seconds!
Save HOURS of photo-editting time!
|
Before |
Turn the picture at left to look like the picture at right. Click on the picture to the right to download a high resolution of it. Then zoom in on the borders and examine how smooth they are! |
After |
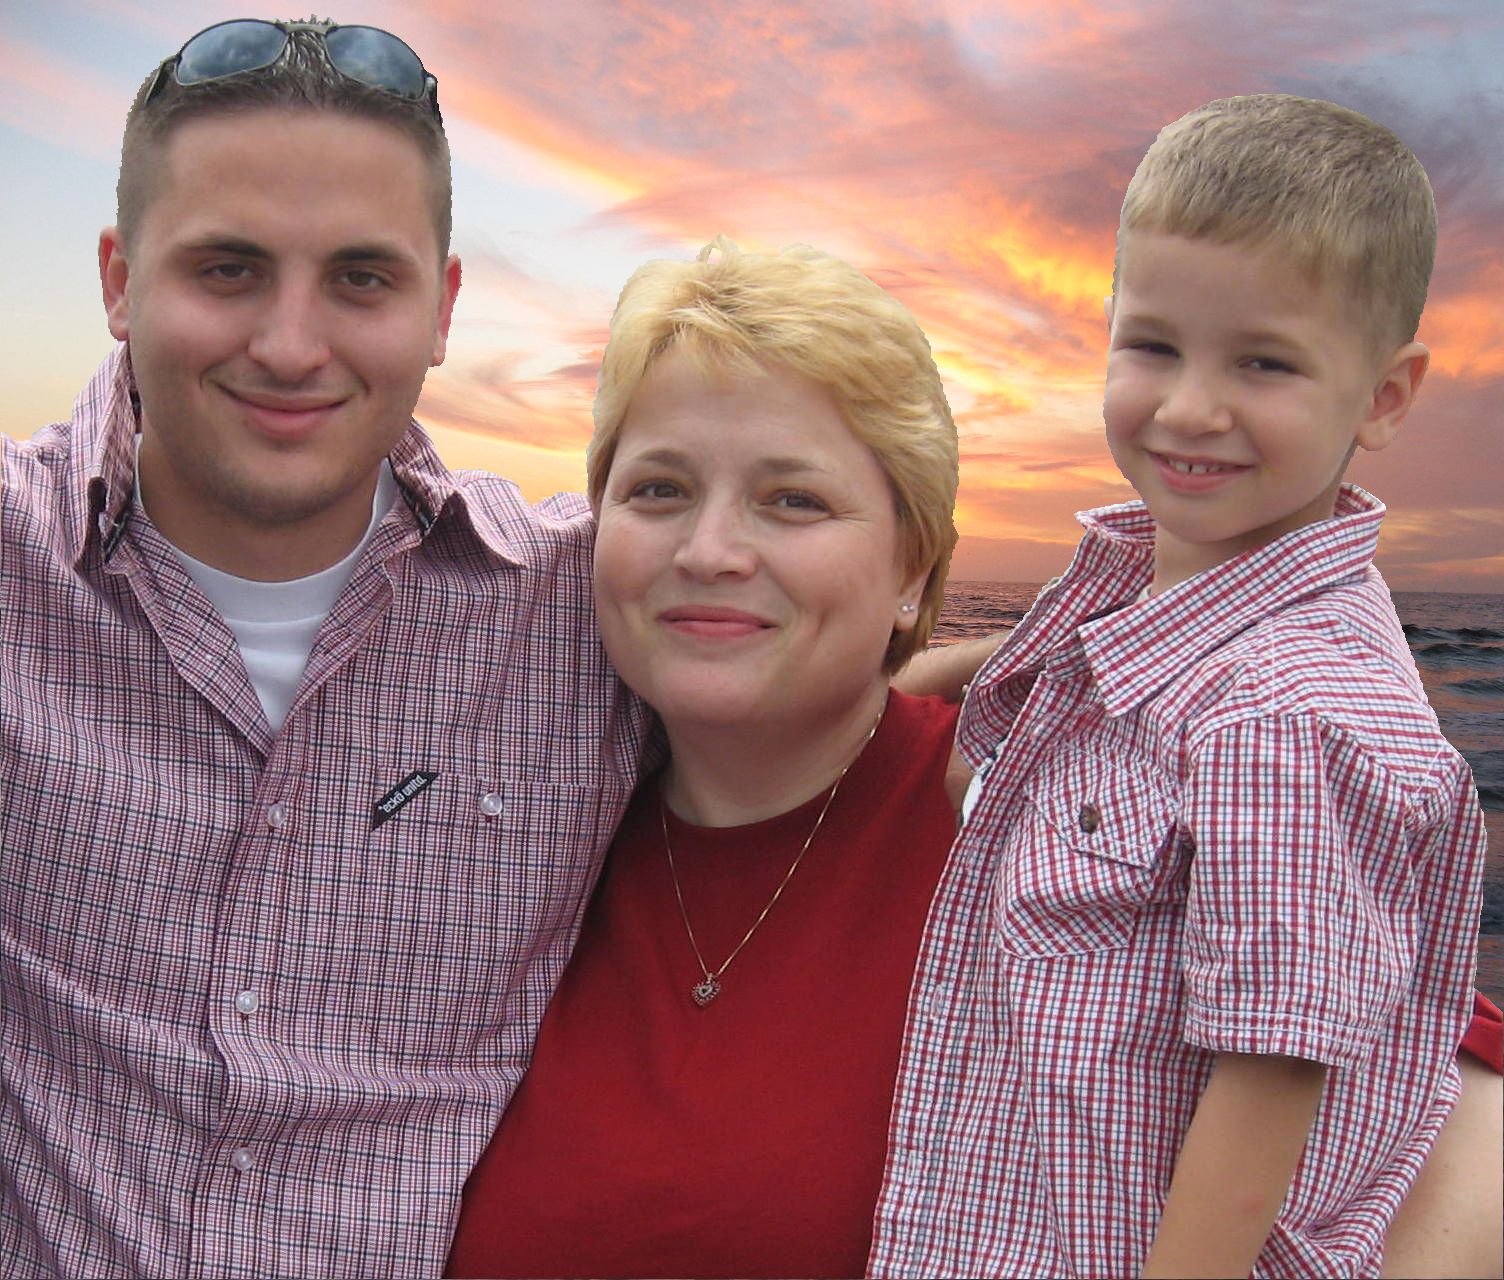
 Before |
Click on both pictures to download them in high resolution.
Then zoom in on the borders to compare. |
 After |
You do not have to manually "feather" the borders at all!
This program softens the borders of objects that have been inserted into other photos. Yes, that's right: all borders, automatically! Just like photos taken with a film camera!
Blending objects into a background image is very easy with the AutoBlend program.
The two files you need for the program to work are:
... the background you want to use (The photos on this web page are in JPG format, for ease in viewing and downloading. The photo format you work with, however, is Bitmap.)
... and the background you want to use with objects (persons, animals, things) dropped into it that want to blend. The two files need to be the same size and must be bitmaps. The easiest way to ensure that these requirements are met is:
Take your background file ("background.bmp") and do a "Save As" or "Export" and rename this file as "background_with_objects.bmp".
(Actually, you can name the bitmaps anything, but this is just an example.)
Then cut out your objects using a pen tablet or lasso tool. If you don't have either of these,
click here.
Copy and paste your objects onto your "background_with_objects.bmp" and then Save. Run AutoBlend. Select your background image "background.bmp". Select your "background_with_objects.bmp" Hit "Run This Program" When you click "Run This Program" AutoBlend automatically locates all the borders and softens them in one click of the button. Believe it or not, it’s just that easy! Click on this picture to download it, and zoom in closely on the borders using Microsoft Paint. See how smooth and blended the borders are now! Magnified X 2
Magnified X 4
How "the other guys" do it... To soften borders using Adobe Photoshop, you use their "feathering" technique: First, you have to specify the amount of pixels you wish to change along the path that you will move your mouse. Then you have to very carefully move your mouse along the borders to "feather" them. This is a very tedious operation. Depending on how many borders there are, this could take hours! Photoshop's "feathering" is not true border blending. Photoshop performs a "pix-mix", meaning simply that the pixels are randomized along the path that you move your mouse.
In contrast, AutoBlend automatically identifies just the borders, and then performs "anti-aliasing" on them, which is just a fancy term for gradual border blending. This is NOT "pix-mixing" at all! All borders are blended gradually with the background as occurs in a natural film camera's images.
It doesn't matter how many 'drop-in' objects you have. Border blending is performed with just one click of "Run This Program".

background.bmp
background_with_objects.bmp
Bitmap 3

Before
After

Before

After
How to Install the Zip File.
To purchase the program, contact me: my email is on the top of the home page
Free "Lasso" program included! A free program module is included that allows you to work with
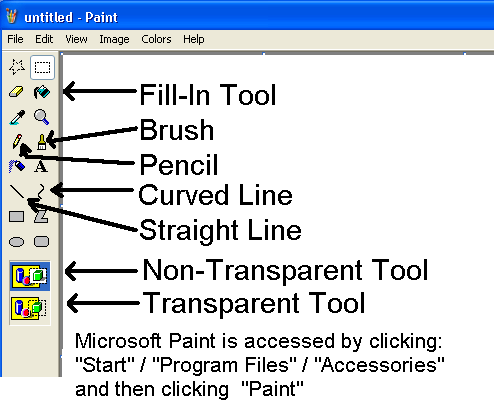
Microsoft Paint
to perform the "lasso" function. This is provided for those users who do not have a pen tablet or lasso tool.
A detailed explanation is included in the
help file.
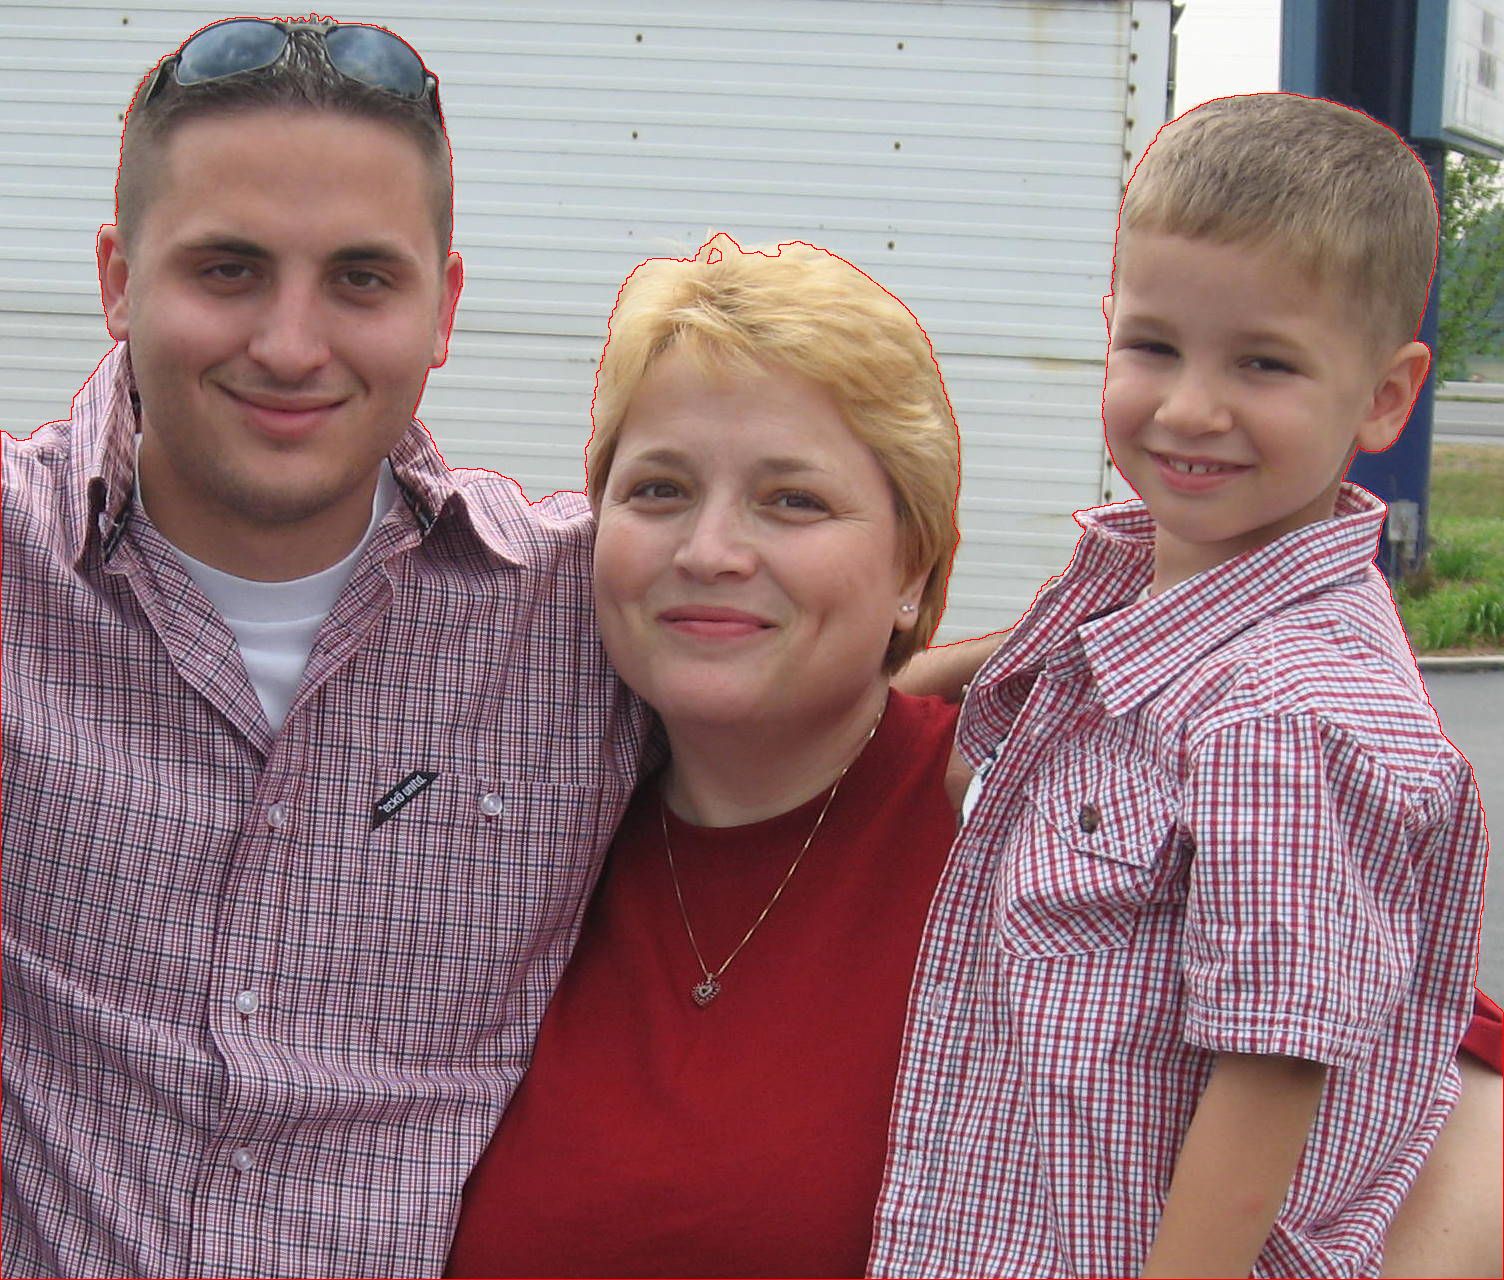
Here's a detailed sequence of the above photo, using the lasso module to isolate your subjects.
Beginning with
the original photo
, you use Paint to
trace the outline of your subjects in red,
then use the free "Trace" module (included with the AutoBlend software) to
turn all your red markings to black.
Using Paint, you
fill in the "bad areas" with black.
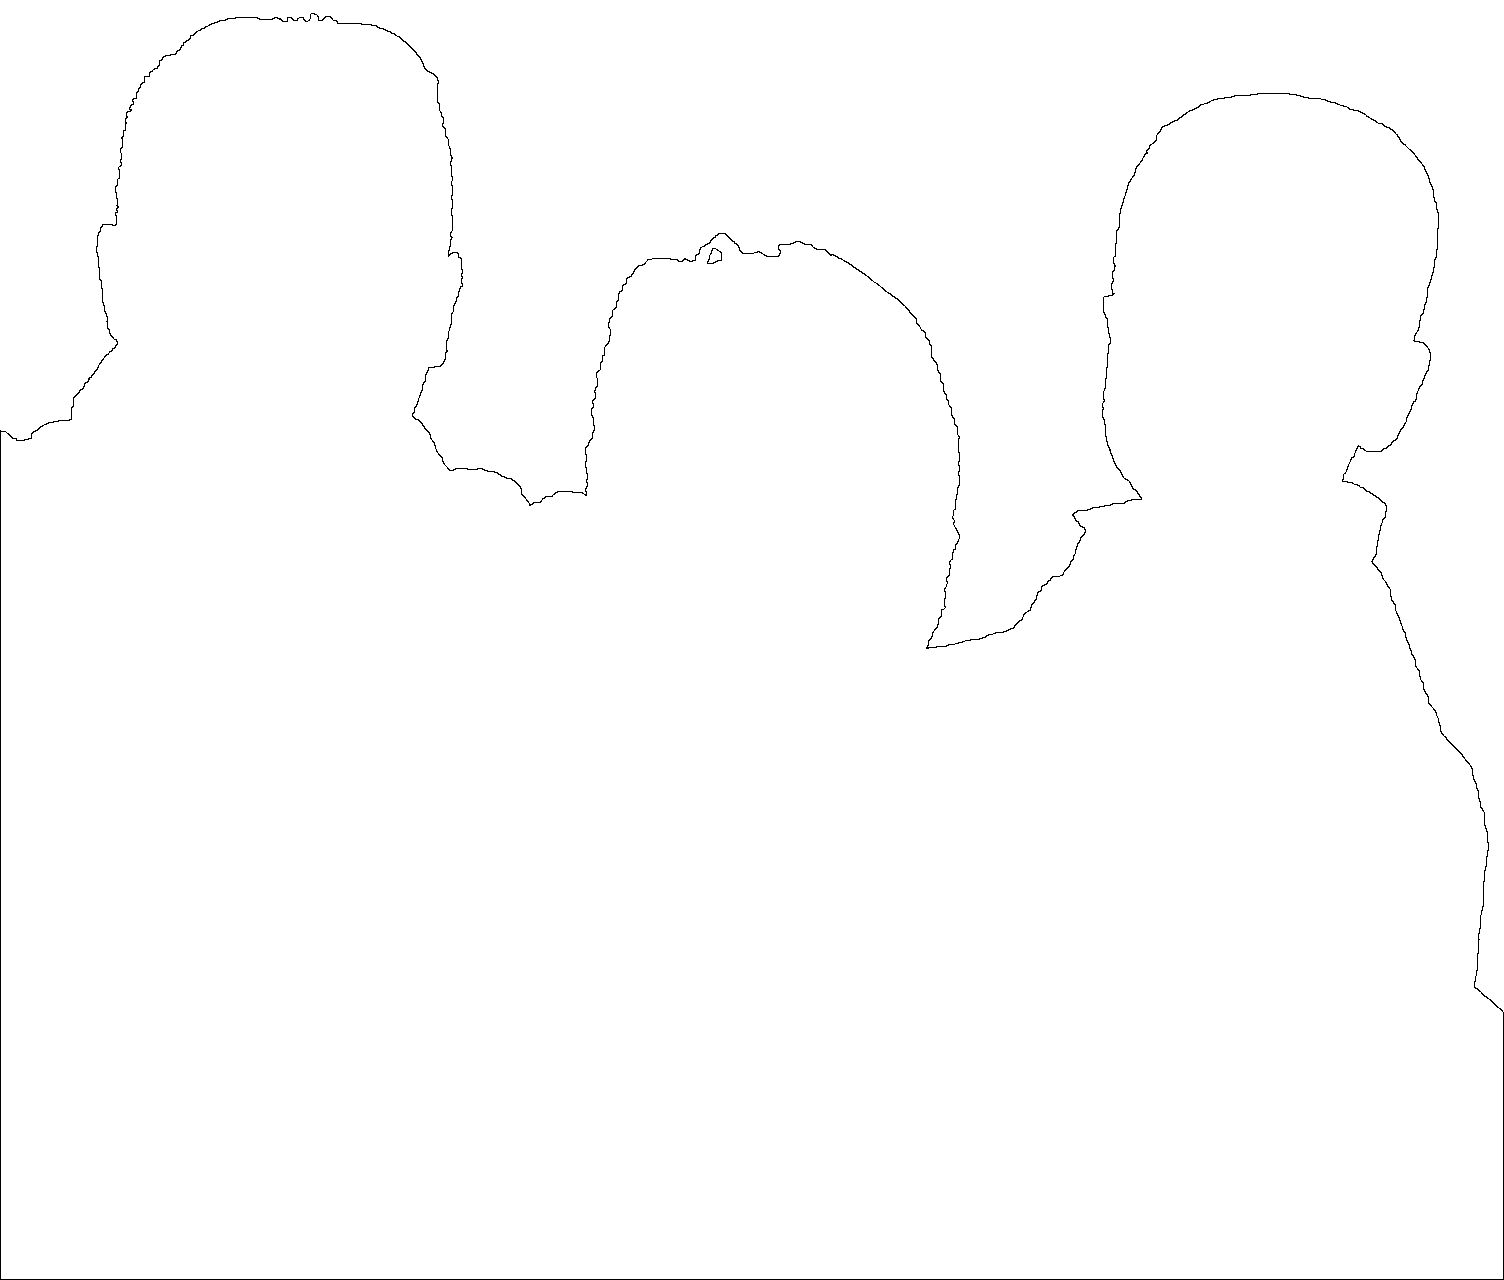
This now becomes a template which you can use to
drop on top of your subjects.
Finally, you use the fill-in tool in Paint to
to turn the black areas to white,
and you're done. You now have a template that's of equal quality as any template that can be produced by Photoshop, Corel, or other photo-editting software. Not only is this FREE, but I think you'll find that it's easier in the long run.
The next step is to copy and paste
the template
you just created on top of your
background image
using Microsoft Paint's
"transparent" tool
, thus producing the above image
"background_with_objects.bmp"
(see above). Again, a detailed explanation is included in the
help file.
The following explains how to install the ZIP file: (1) Copy the Installation ZIP folder to your Desktop. (2) Right click on the Installation ZIP folder. (3a) If you see "Extract All", then click this. Click "Next", and let the computer create a folder onto your desktop. It will then extract the files into it. (3b) If you don't see "Extract All", then click "Explore", and then click "File". You should then see "Extract All". Click on this. (4) Click "Next", and let the computer create a folder onto your desktop. It will then extract the files into it. (6) Click "View Extracted Files", or browse to the folder (using 'My Computer' or 'Windows Explorer') that was just created. You may now run the program by clicking on "Borders.exe". You can also move/copy this folder anywhere on your hard drive, an accessory drive, or even a flash drive. You can also click "Install.exe" to copy the contents of this folder here c:\Program Files\PELT\AutoBlend
For a full explanation on this program,
view Help.pdf
using Adobe Acrobat Reader. This PDF file is included in this ZIP folder, and will be copied to c:\Borders. To Windows VISTA users: Run the program by right-clicking on "Borders.exe" (the icon is a yellow torch), and then click "Run as Adminstrator".
AutoBlend was written by Doug McMullin, January, 2009.
Photoshop1234.com